seewang.me now served over HTTP2

You surely have heard HTTP2 and its advantage over the good old HTTP1.1, security, performance blah blah blah…
And it bizarrely easy to enable on my Nginx.

Firstly some requirements:

Nginx > 1.9.5
OpenSSL > 1.0.2

Then add http2 to the server configuration, after listen 443 ssl.

server {
    listen 80;
    server_name seewang.me www.seewang.me;
    return 301 https://seewang.me$request_uri;
}
server {
    listen 443 ssl http2;
    server_name seewang.me www.seewang.me;

    #rest of config...
}

And that’s it, now we can check it on Chrome Developer Tools > Network tab, we’ll need to right click on the column header and check Protocol column.
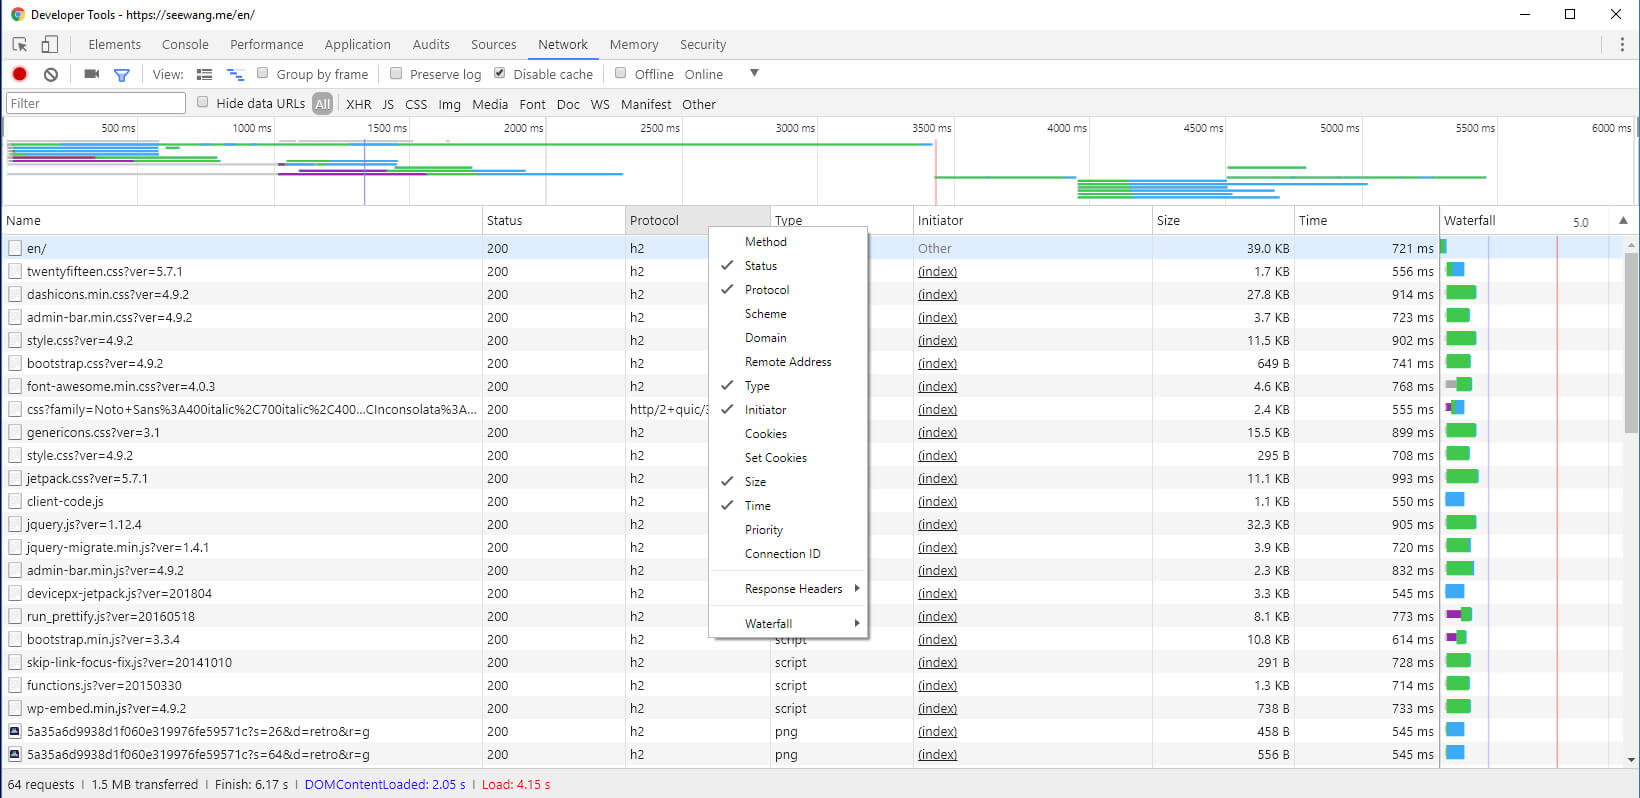
Chrome Developer Tools

Free SSL Certificate, Let’s Encrypt

When I first launched this blog, I set up an SSL certificate from StartCom. It was an okay experience to use, other than I had to renew it via their site every year. But a couple of days ago, Chrome prompted SSL errors when I visited the blog and refused to recognise the certificate even after I renewed it. A quick Google search tells that StartCom got themselves banned by Chrome and Firefox.

So I went on looking for new certificate provider and apparently Let’s Encrypt is the best call right now.

Differ from StartCom, Let’s Encrypt has a program can be run directly on the server to get a certificate and auto-configure HTTPS (didn’t work though), which is much easier.

According to the doc, all I had to do was just downloading and then running.

    wget https://dl.eff.org/certbot-auto
    chmod a+x certbot-auto
    ./certbot-auto

Unfortunately, it doesn’t recognise my Nginx settings, so I had to get certificate firstly and configure it myself manually

    ./certbot-auto certonly

During the run it will promote to let you enter the domain name and the root of web server etc., you can refer the official site(https://letsencrypt.org/) for detail. But in general, it was pretty easy and nice.