最近发现了一个 Go 写的 Webhook 库,一个json文件就能完成配置,用起来非常方便,于是就动手给博客服务器加上了自动部署的 webhook。
下载
adnanh/webhook 就是上面说到的库了,Ubuntu 17.04 及之后的版本可以直接通过 apt install webhook, 而较老的版本或其他分支,可以直接在 Release 页面下载对应的预编译版本或者克隆下来从源码编译。
json配置文件
首先创建一个 json 配置文件。
[
    {
        "id": "deploy-repo",
        "execute-command": "/path/to/deploy.sh",
        "response-message": "Executing deploy script",
        "trigger-rule": {
            "and": [{
                "match": {
                    "type": "payload-hash-sha1",
                    "secret": "my-secert",
                    "parameter": {
                        "source": "header",
                        "name": "X-Hub-Signature"
                    }
                }
            }, {
                "match": {
                    "type": "value",
                    "value": "refs/heads/master",
                    "parameter": {
                        "source": "payload",
                        "name": "ref"
                    }
                }
            }]
        }
    }
]
自动部署脚本
接下来,我们需要创建对应的部署脚本。以 Laravel 项目为例:
#!/bin/bash
cd /path/to/repository
git fetch -all
git reset --hard origin/master
git pull
composer install --no-dev
npm install
npm run production
php artisan route:cache
php artisan config:cache
接下来运行下面的命令就可以启动 webhooks 了。
/usr/bin/webhook -hooks /etc/hooks/hooks.json -hotreload
默认配置下,程序会运行一个 webserver 监听 9000 端口,并把 webhook 配置在 http://ip-of-server:9000/hooks/deploy-repo 下。
这时我们直接访问上面的 URL 会显示:
Hook rules were not satisfied.
这表示 webhook 已经成功运行了,但是因为没有满足执行脚本的条件。
配置 Github 仓库
接下来就要在 Github 中添加配置来自动访问 webhook。
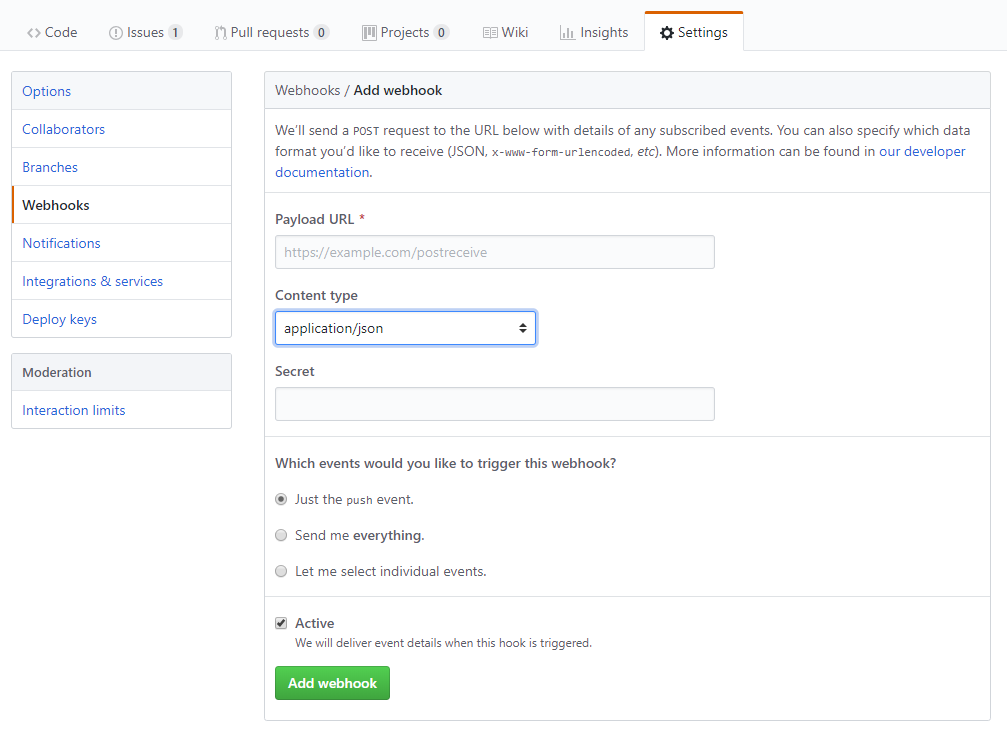
在想要自动部署的仓库中找到 Settings > Webhook > Add webhook,在 Payload URL 中填入上面的 URL, 在 Content Type 选择 application/json,在 secret 中填入上面 json 配置文件中的 secret,然后点击确认就好了。
创建 webhook 服务
目前为止, webhook已经能实现所有功能了,但是现在我们的程序还只是在 SSH 上运行,因此我们用 systemd 起一个服务使其能在后台常驻运行。
在 /etc/systemd/system 路径下,建立一个 webhook.service 的文件:
[Unit]
Description=Webhook

[Service]
ExecStart=/usr/bin/webhook -hooks /etc/hooks/hooks.json -hotreload

[Install]
WantedBy=multi-user.target
然后启动服务:
systemctl enable webhook.service
systemctl start webhook.service
然后我们就可以通过 service webhook status 来确认服务是否成功启动了:
● webhook.service - Webhooks
   Loaded: loaded (/etc/systemd/system/webhook.service; enabled; vendor preset:
   Active: active (running) since Tue 2019-03-12 11:18:36 CST; 3 days ago
 Main PID: 25652 (webhook)
    Tasks: 8 (limit: 1110)
   CGroup: /system.slice/webhook.service
           └─25652 /usr/bin/webhook -hooks /etc/hooks/hooks.json -hotreload
添加反向代理
毕竟直接用 IP + 端口访问有些丑陋,我们给我们的 webhook 加上反向代理,顺便加上 https。这一步其实和 webhook 无关,所以不详细说了,贴出我的 Nginx 的配置,仅供参考。
server {
    listen 80;
    server_name webhooks.seewang.me;
    return 301 https://webhooks.seewang.me$request_uri;
}
server {
    listen 443 ssl http2;
    server_name webhooks.seewang.me;
    ssl_certificate /etc/letsencrypt/live/seewang.me/fullchain.pem;
    ssl_certificate_key /etc/letsencrypt/live/seewang.me/privkey.pem;
    include /etc/letsencrypt/options-ssl-nginx.conf;

    location / {
        try_files $uri @proxy;
    }

    location @proxy {
        proxy_pass http://webhooks;
        proxy_pass_request_headers on;
    }
}

upstream webhooks {
  server 127.0.0.1:9000;
}